Azure Functions – Development and Deployment
Using Visual Studio Code Editor
Azure Functions is a service that allows you to run code in the cloud without having to manage servers, infrastructure, or scaling. You can write functions in various languages, such as Python, Java, C#, JavaScript, and more, and trigger them by events like HTTP requests, or schedules.
Azure Functions handles the execution and resource allocation for you, so you only pay for the time your code runs.
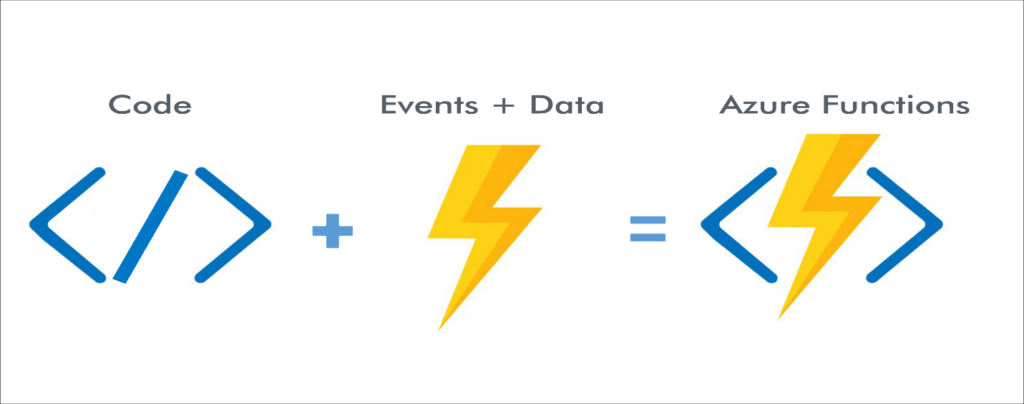
There are different ways to create Azure Functions, depending on the language, tool, and platform you prefer. Here are some of the common options –
- Using Azure portal
- Using Visual Studio
- Using Visual Studio Code
- Command line (Azure CLI)
Creating functions using the Azure portal is a quick and easy way to get started, but it has some limitations for editing and debugging. The built-in code editor in the Azure Portal is suitable for simple edits, but it might not offer the same level of features and convenience as a dedicated integrated development environment (IDE) like Visual Studio or Visual Studio Code.
To get the full development experience of working with Azure Functions, we go for Visual Studio Code editor as it provides cross-platform support, extensive extension ecosystem, debugging capabilities, built-in GIT integration, etc.
In this article, we will discuss how we can create and deploy new Azure Functions using Visual Studio Code editor.
In this post, we will cover:
- Creating a new Function App
- Creating new Function and deploying to Function App (Follow from here if you already have a Function App created and want to deploy Function to exiting Function App)
Create New Function App
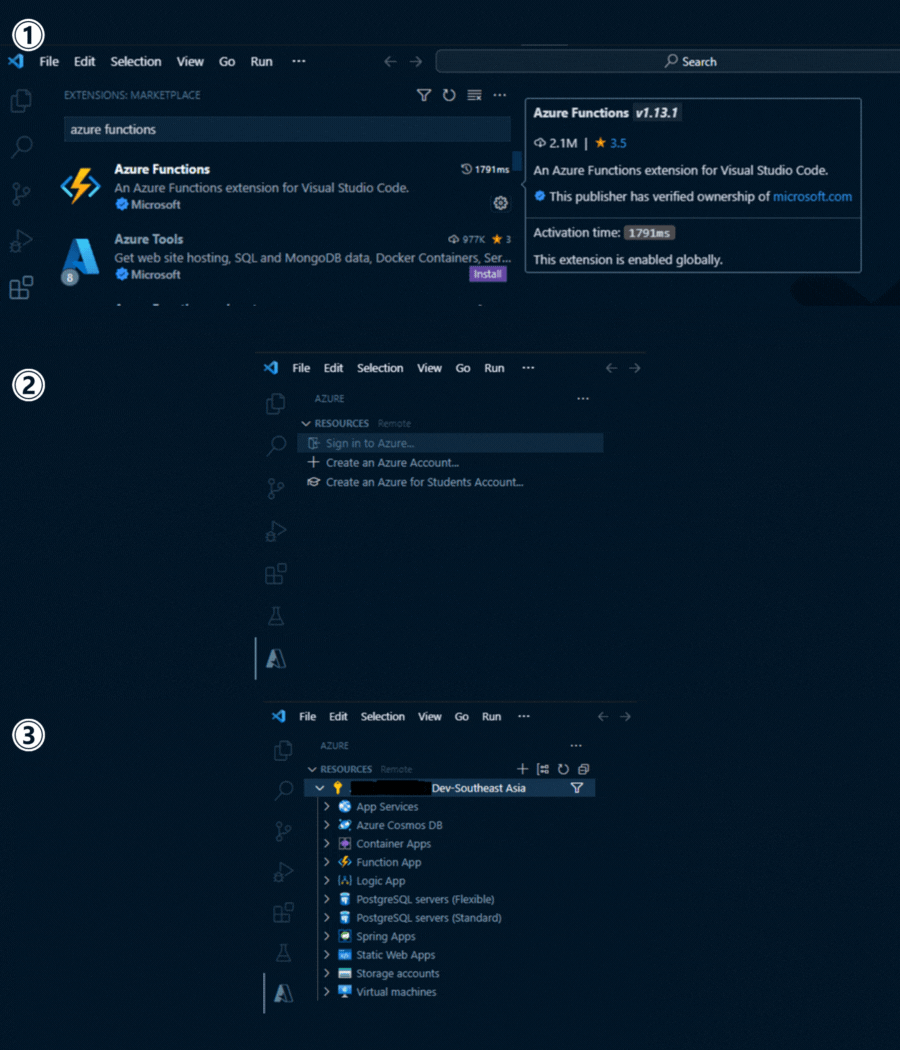
The following figure demonstrates the steps to
1. Install Azure Functions extension in VS Code (Search for Azure Functions in the extensions search box and then click Install)
2. Click on the installed extension and sign in to your Azure Account
3. Once logged in you will be able to see the various Azure services on offer
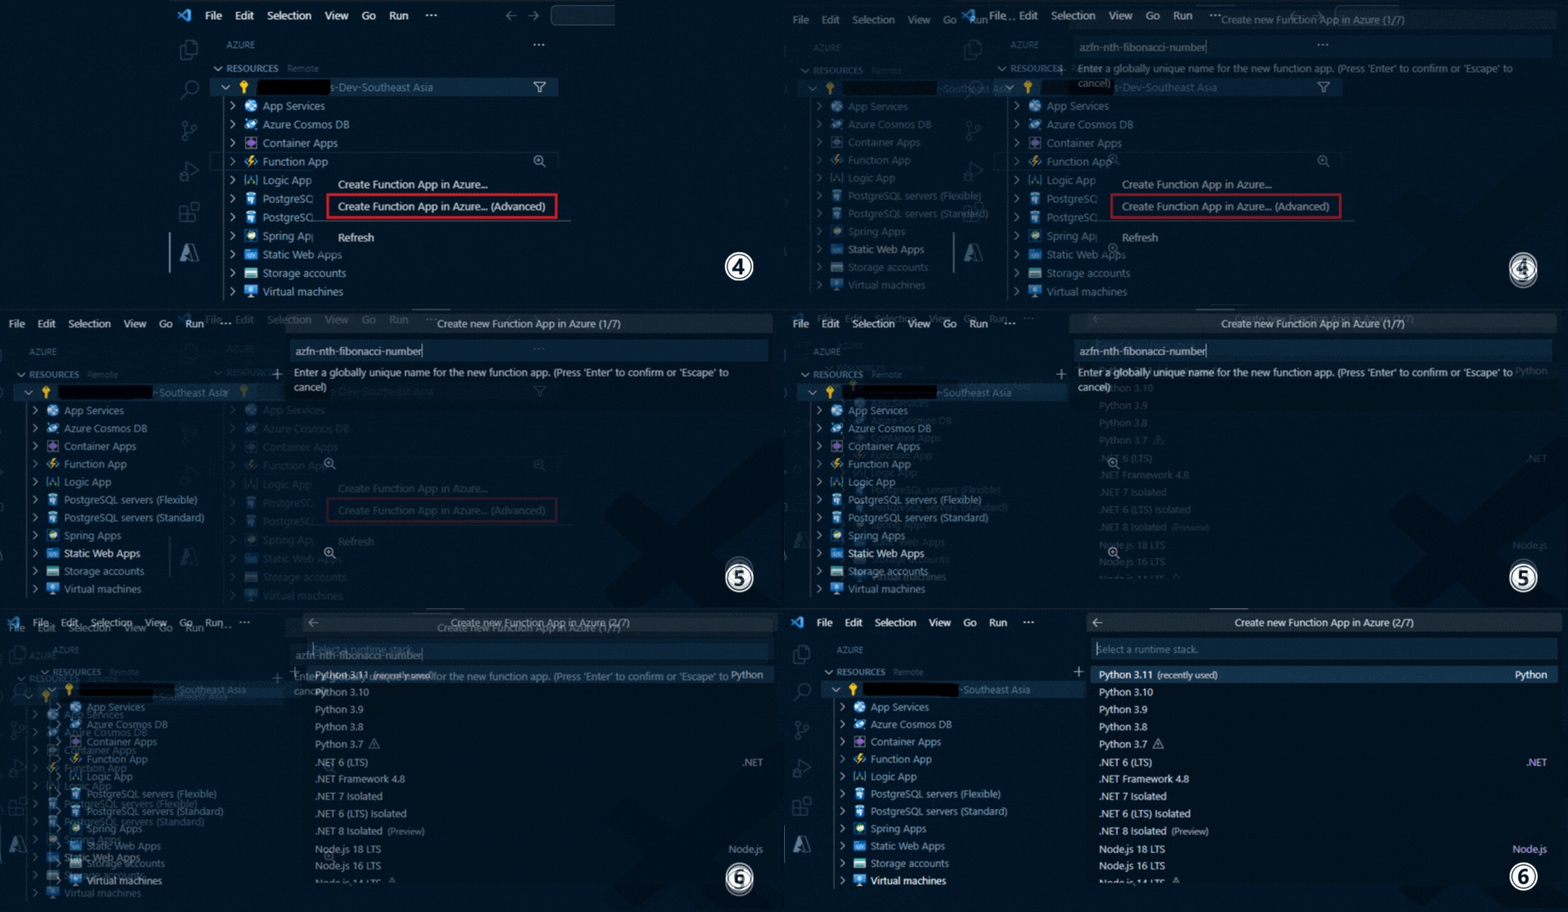
To create and configure a Function App
1) In the Azure Services right click on Function App and select the Create Function App in Azure (Advanced) option.
2) Provide the Function App name. We will use finding the nth Fibonacci number problem as an example.
3) Select runtime stack i.e. programming language along with version.
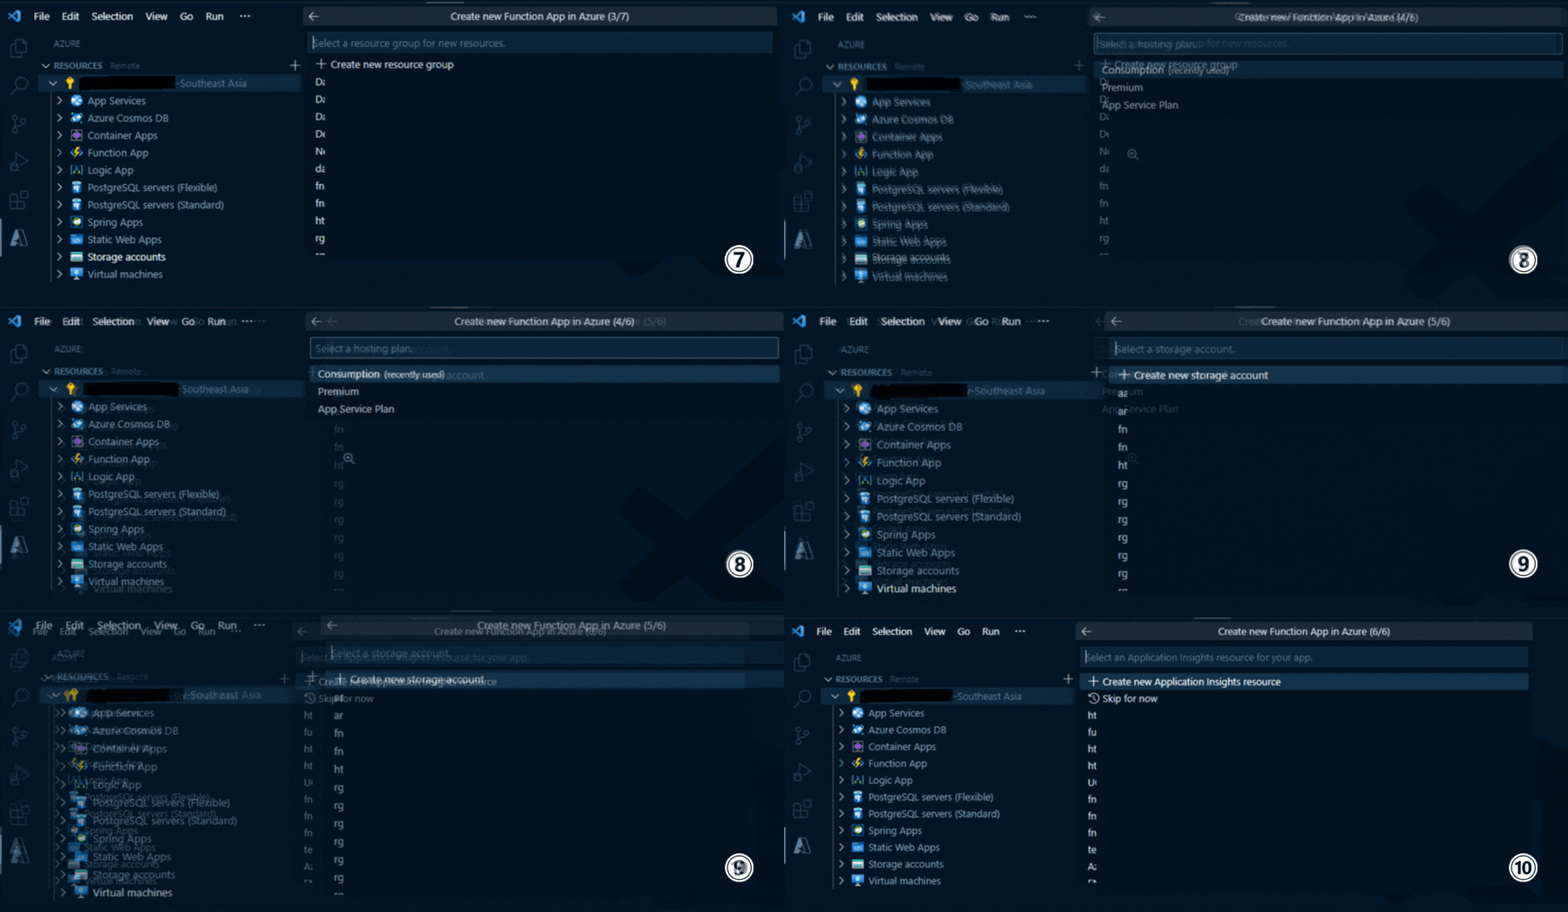
Next you will choose the following :
1. Resource Group: existing or create a new (if you have required permissions).
2. Hosting plan: We will use the Consumption plan for this demo.
3. Storage Account: existing or create a new (if you have required permissions).
4. Application Insights are not being covered by this topic so can be skipped
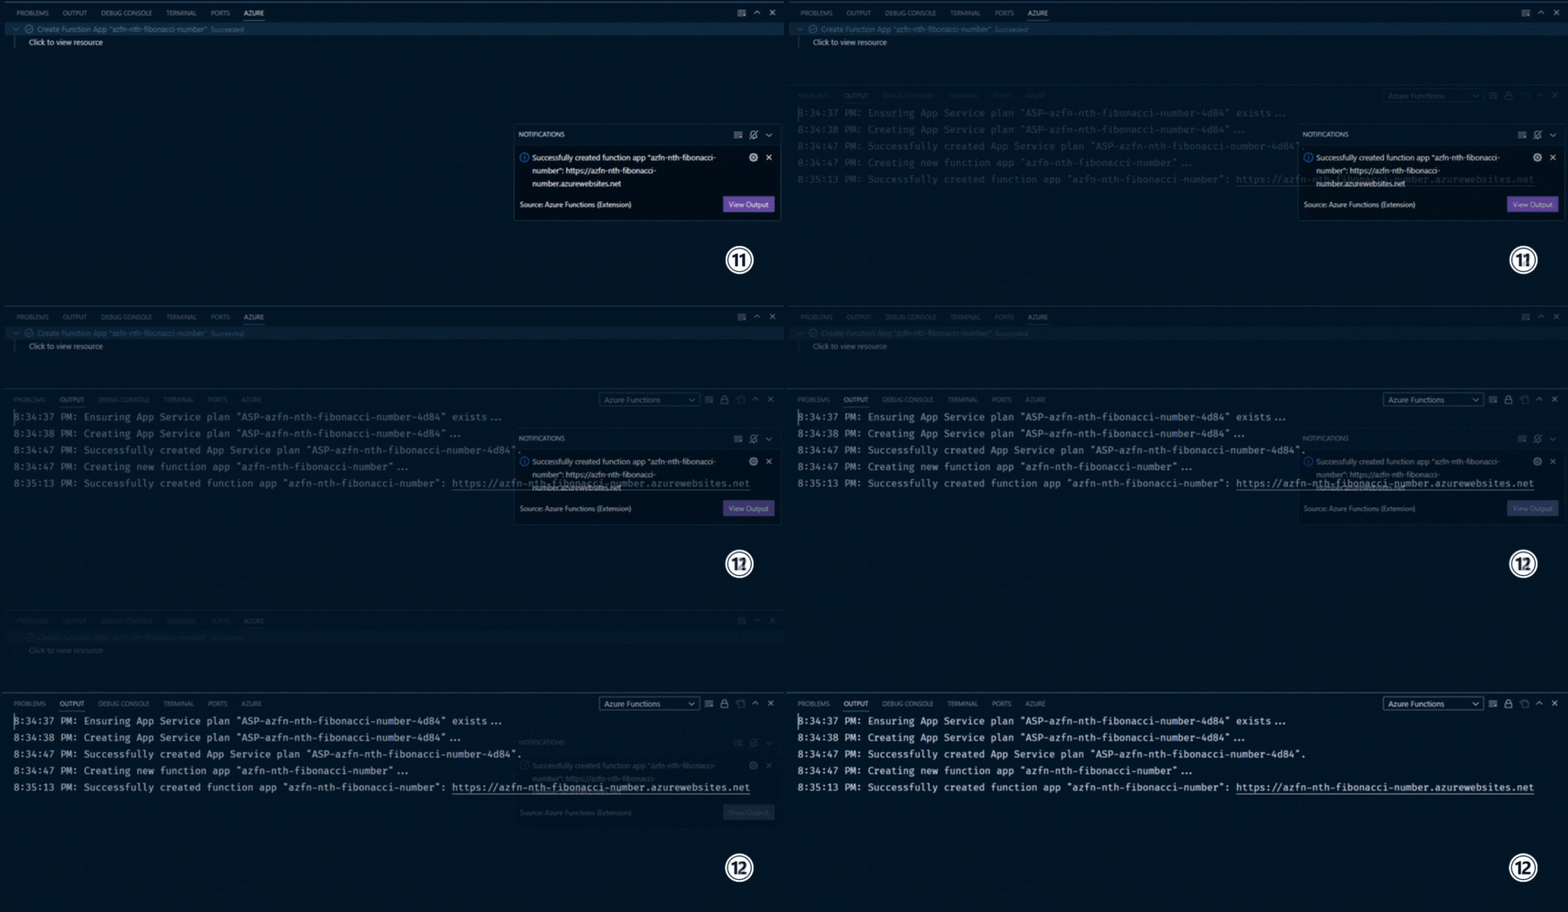
After selecting the required options (referred above), Azure Function App will be created in the selected Resource Group. You can confirm that by the output message in the Azure tab. (Hit Ctrl + ` to open terminal and go to Azure tab). Go to Output tab to check the logs.
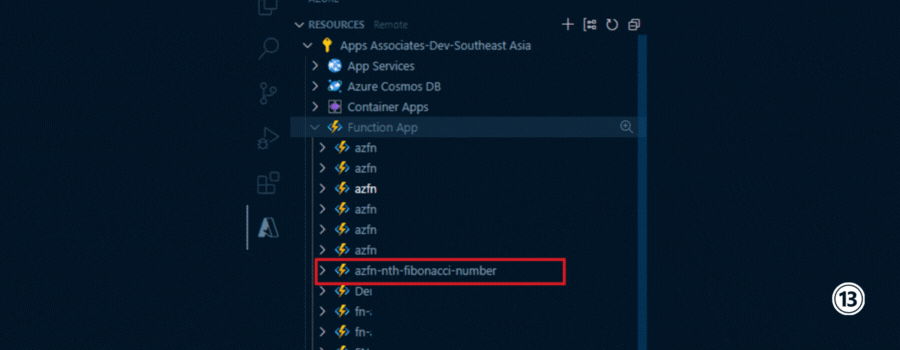
Refresh the resources by clicking the refresh icon on the right. You can now see the new Function App created in the Resources panel. .
Create New Function and Deploy to Function App
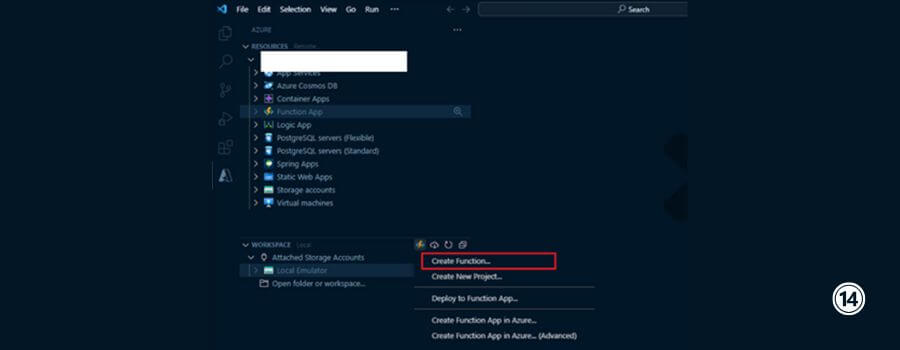
Now, you have to create a function and deploy to Function App. For this, go to Workspace panel, then click on the Azure Function icon![]() , then choose Create Function option. .
, then choose Create Function option. .
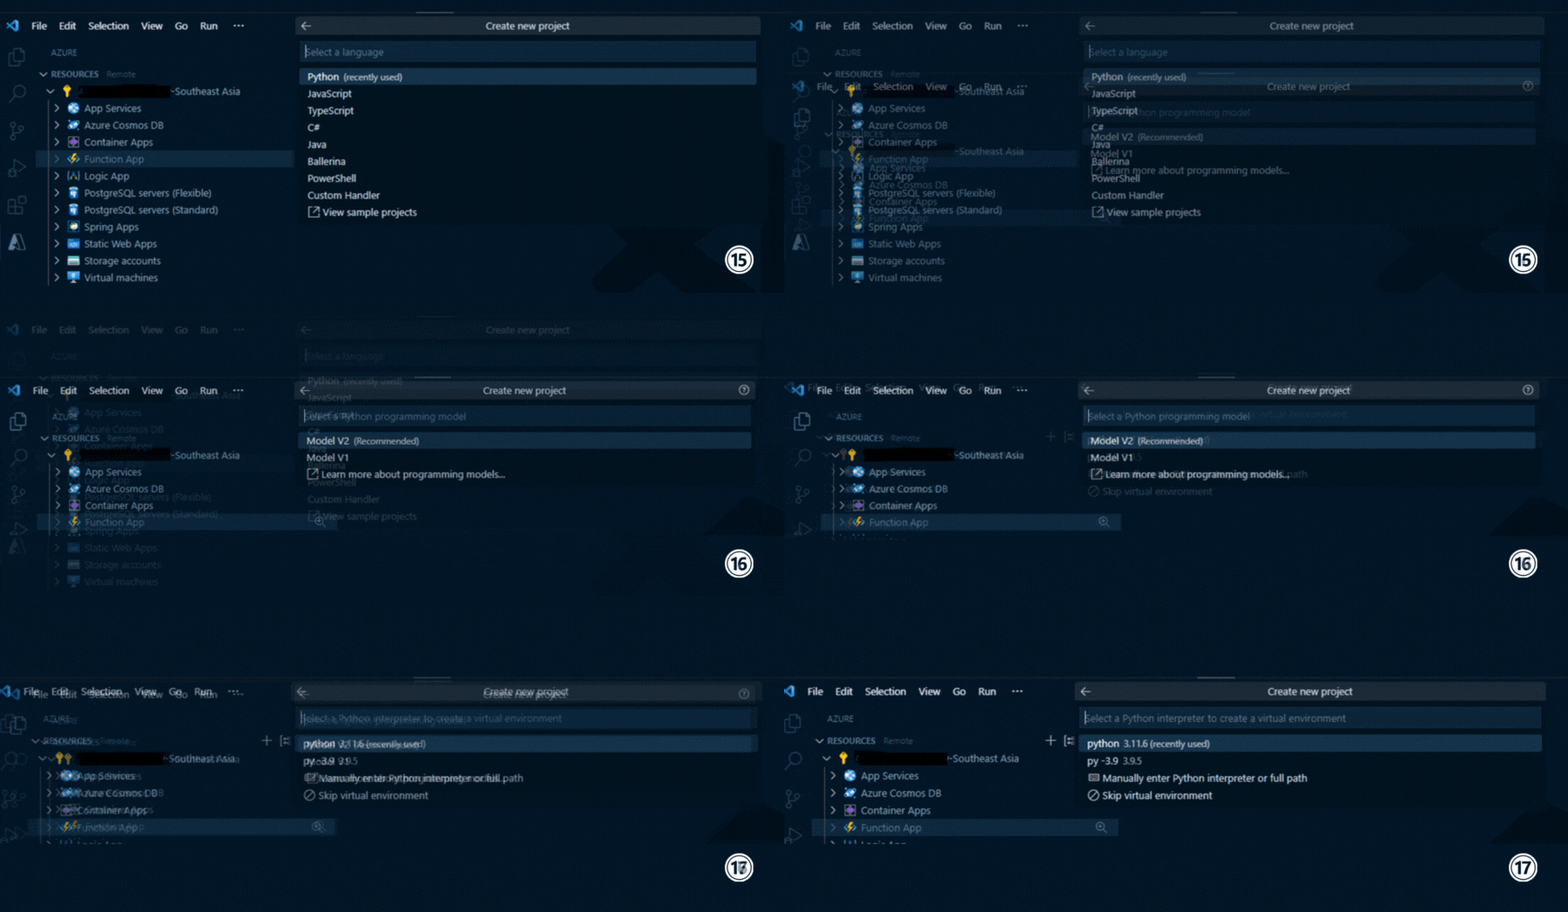
To continue, either open VS Code in a folder or select the folder for VS Code. Next, select the programming language and its version, models (if any). Here will go with Python 3.11.6 – Model V1. .
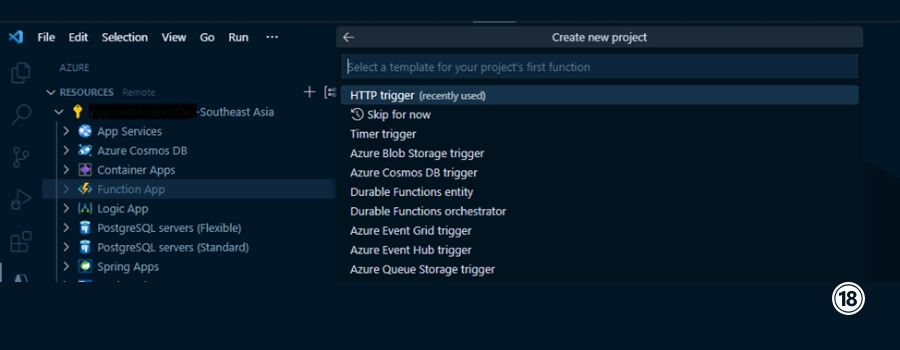
Choose the Trigger type like HTTP trigger, Timer trigger, Event driven trigger, Blob or Queue based trigger. Will go with HTTP trigger. .
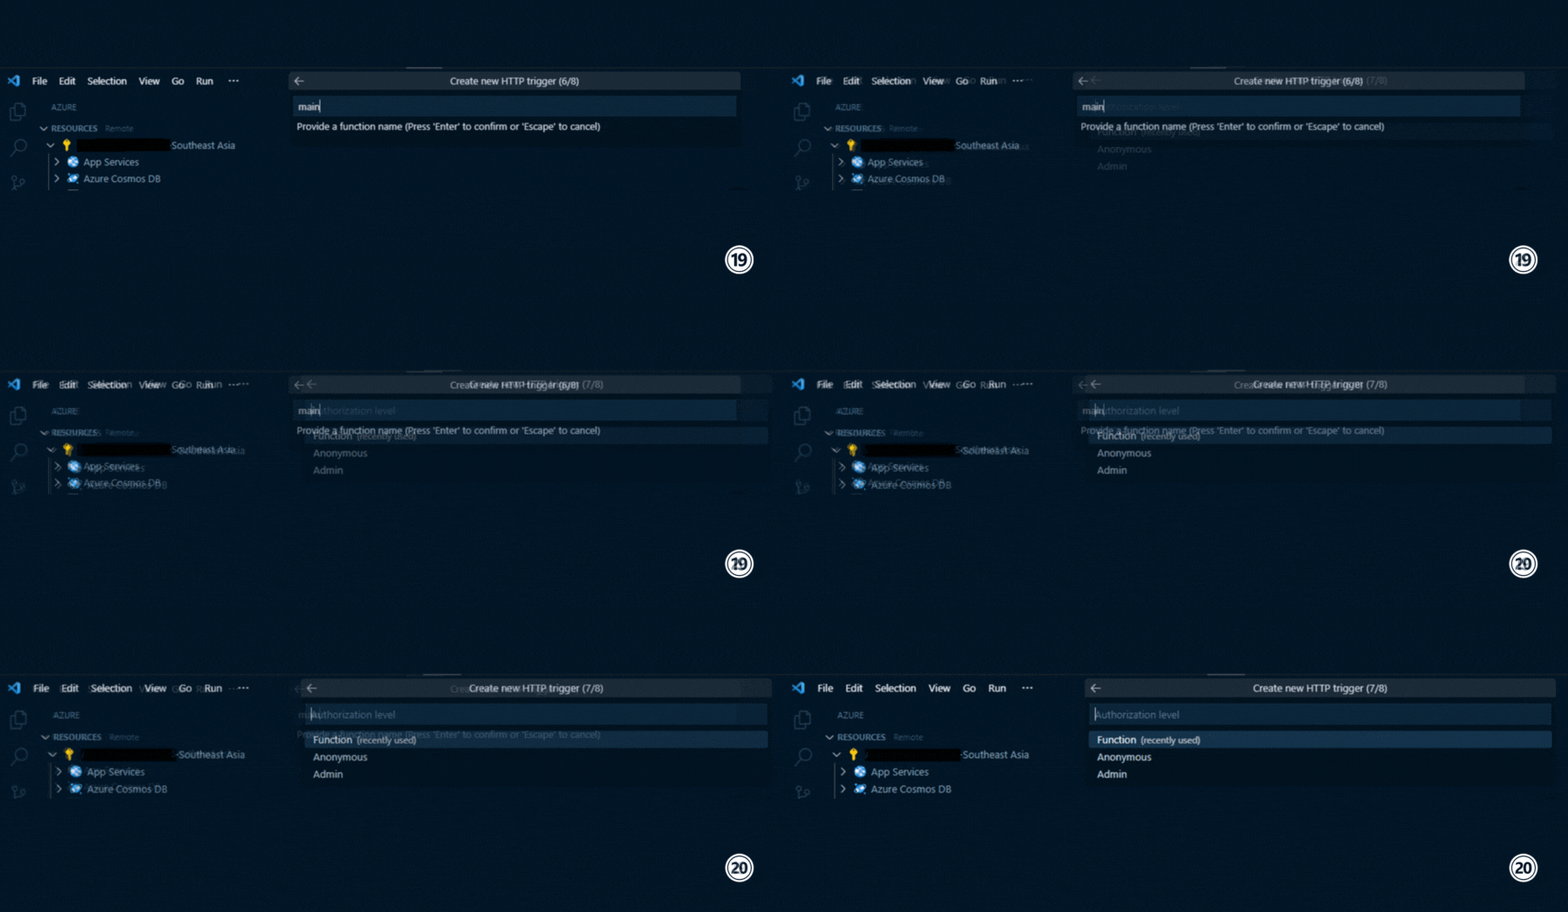
Provide the function name and the Authorization level.
Azure Functions offer three authorization levels.
1) Anonymous: No authentication required, accessible by anyone.
2) Function: Requires a function key to authenticate the caller.
3) Admin: Reserved for administrative actions, offers higher privileges
Here we will choose Function as authorization. .
After providing details, it will take 2-3 min to create a function with boilerplate code.
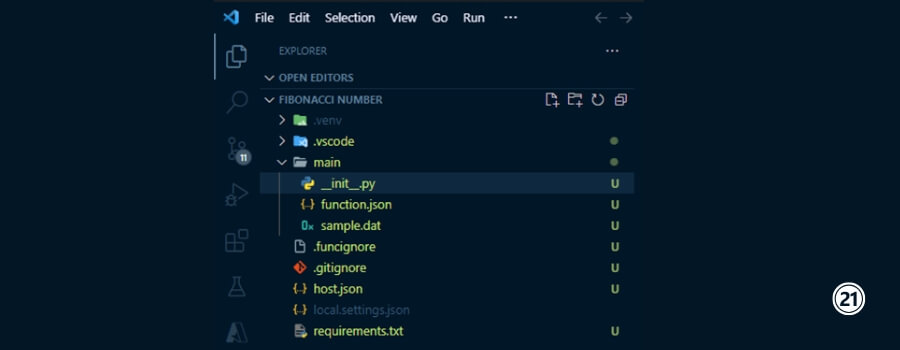
The function folder contains –
1) main folder: Where actual python files reside. Entry point file is also present in this folder. Folder name will resemble the function name. For every function within Function App, a folder with function name will be created. Each function folder will have its own entry point file (__init__.py file).
2) __init__.py file: Entry point file.
3) function.json file: This file that contains the configuration metadata for the function. A function can only have a single trigger binding, and can have multiple input/output bindings. All these details are present in function.json file.
4) .gitignore file: Git ignore file
5) .funcignore file: Function ignore file (similar to .gitignore). Declares files that shouldn’t get published to Azure
6) host.json file: This metadata file contains configuration options that affect all functions in a Function App instance.
7) local.settings.json file: This file stores app settings and settings used by local development tools. Settings in the local.settings.json file are used only when you’re running your project locally. Used to store app settings and connection strings when running locally. This file doesn’t get published to Azure
8) requirements.txt file: Contains the list of Python packages the system installs when it publishes to Azure
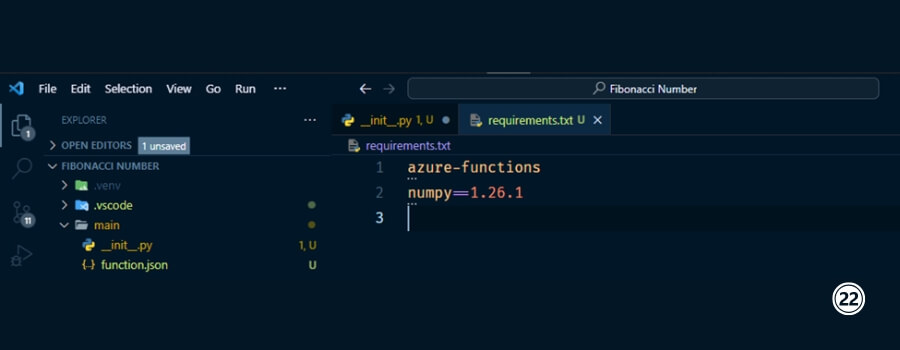
Python packages which are used in the project are listed in requirements.txt file.
Command pip freeze > requirements.txt can be used to list all packages and write to requirements.txt file.
If you already have a requirements file and want to install all listed python packages locally, use pip install –r requirements.txt command.
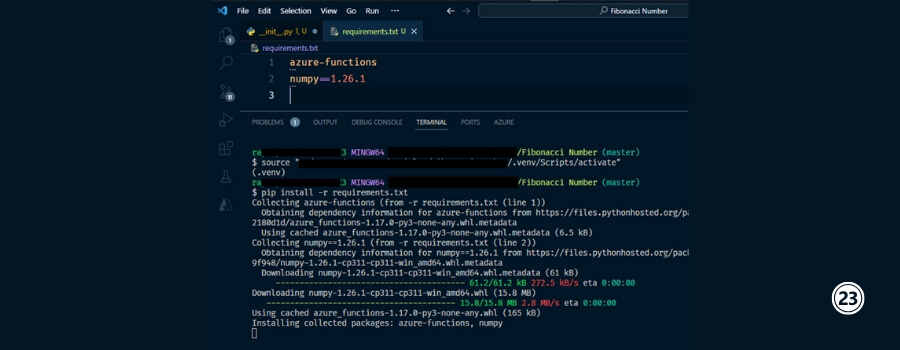
__init__.py file acts as an entry file. You can also change this in function.json file.
A main function is given as part of boilerplate code. This main function acts as an entry function and returns a value (Can also return out variables, which are configured in function.json file). This function is called by Azure function runtime instance.
Main function accepts a parameter of type func.HttpRequest and returns func.HttpResponse. That’s why return statement in main function looks like return func.HttpResponse(str_variable)
You can create multiple functions (using def keyword) inside the file and can be used as regular functions.
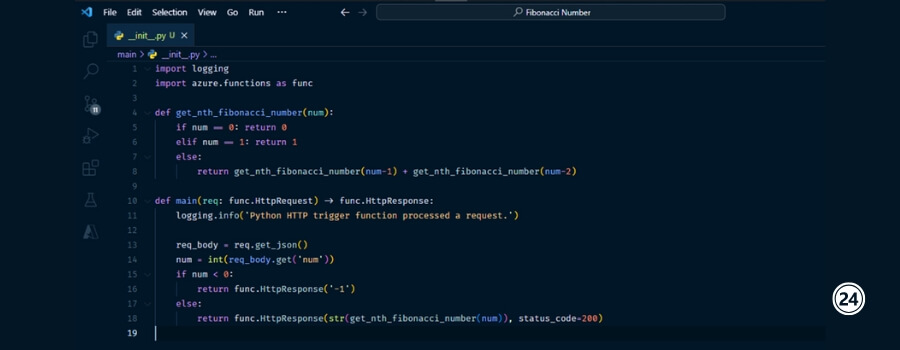
sample.dat file used to store the sample input data. This file gets published to Azure functions portal.
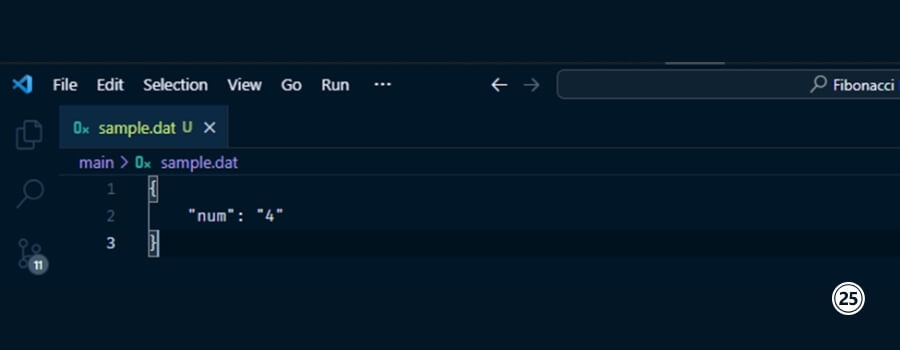
Once function code is finalized and tested locally, it’s now time to deploy. To do the below steps are necessary:
1. Go to Workspace panel, then click on the Azure Function icon![]() , then choose Deploy to Function App… option.
, then choose Deploy to Function App… option.
2. Choose the Function App which is present in Azure portal.
3. After selecting the Function App, confirm and click Deploy.
4. This will deploy the latest code from local to Azure cloud and overwrite the existing function code.
Check Output Tab (Ctrl + ` to open Terminal and go to Output tab) for deployment logs. You will get a VS code notification after successful deployment.
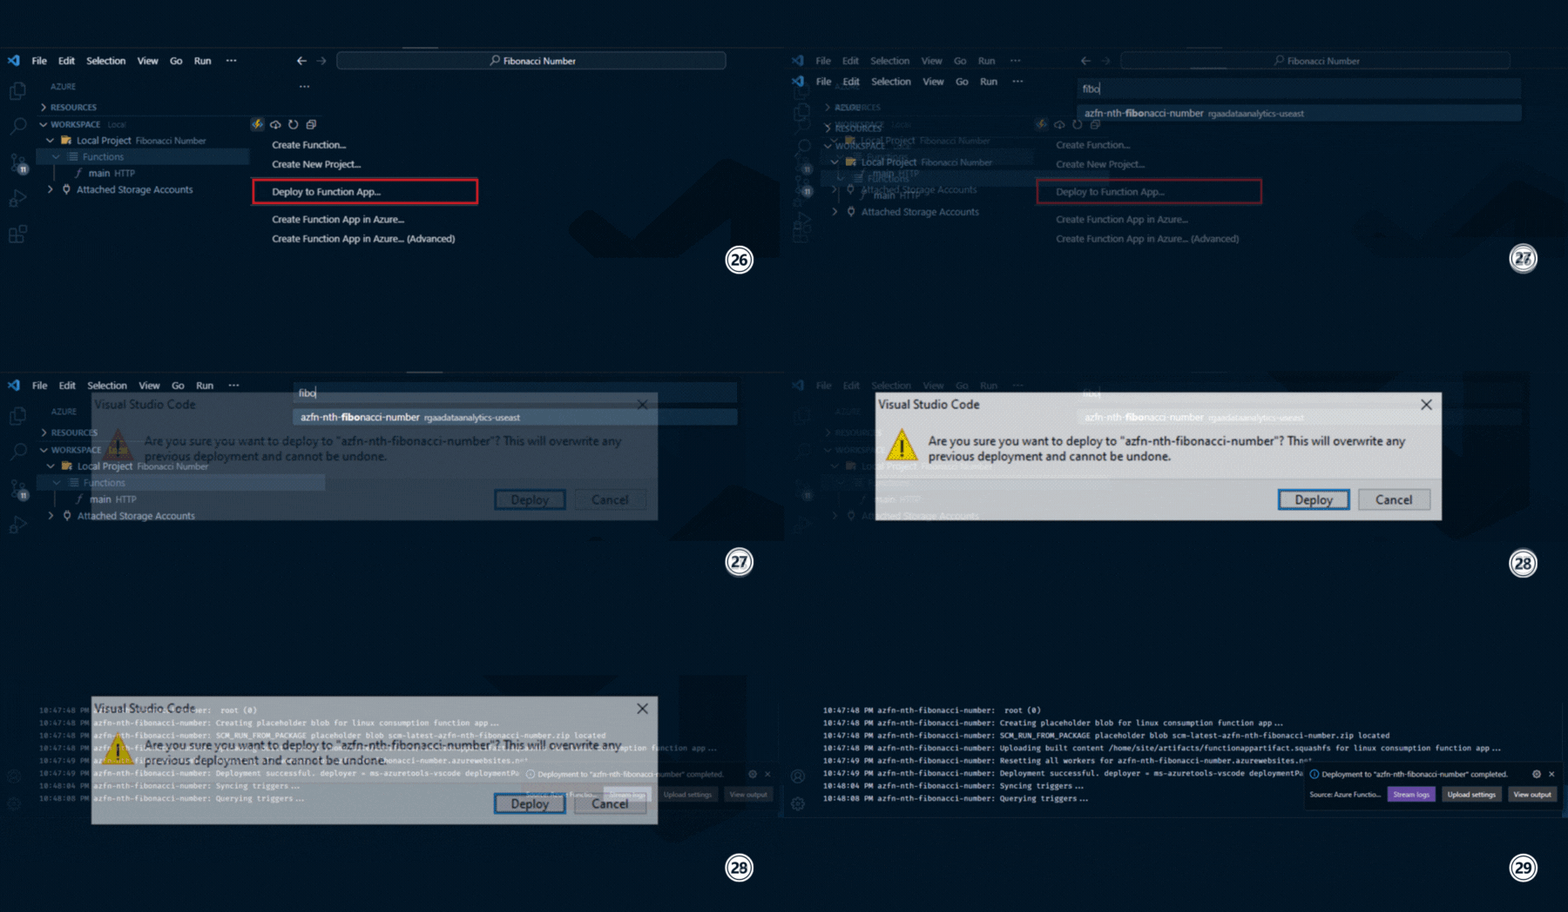
You can also confirm the successful deployment of function from Azure portal.
Go to Azure function and open the Function App, in the Overview panel, at the end, you will see the function name. Clicking on it will open the function code and other function details.
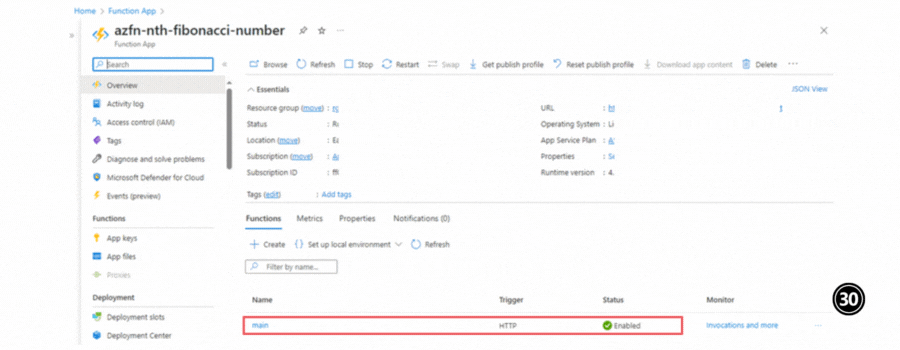
When you click on the function name (located at bottom of Overview panel of Function App), a new window will open which contains actual function code, function keys, monitoring options etc.
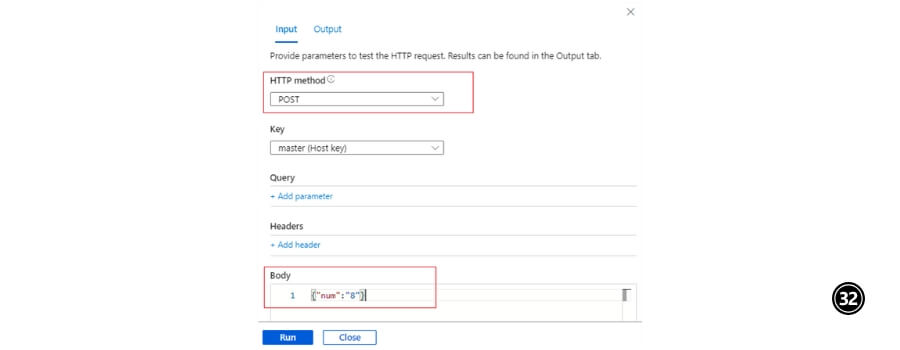
Click Test/Run at the top row to run the function. A new side panel will open from right.

In the right side panel, provide HTTP method and Body (in case of POST method). By default master key is selected as function key. You can also add additional headers, if required.
In the body section, JSON object is passed in form of func.HttpRequest.
Click Run at the bottom.
If no errors in the code, the output data will be shown along with HTTP response code.
You can manage what code to return in the function return value.
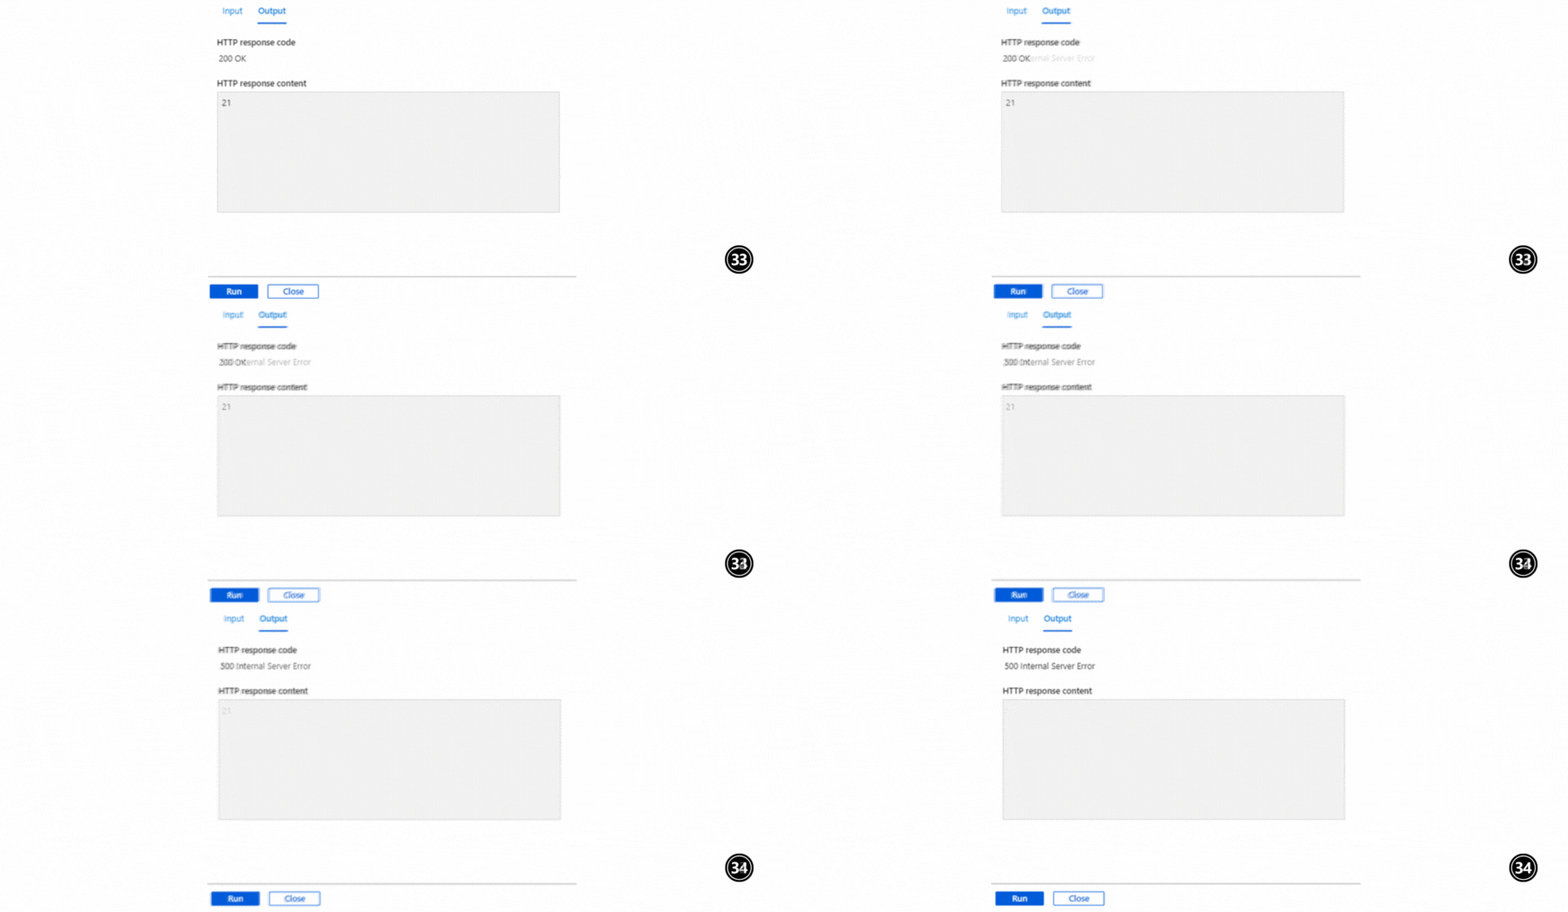
In case of any errors, you can always check the code locally and fix the bugs OR
Azure Functions integrates very well with Application Insights which enables you to monitor your Function Apps. Application Insights is an Application Performance Management (APM) service that collects data generated by your Function App, including information your app writes to logs.
