Connecting to Oracle Database (Cloud) and Oracle EBS in Power BI Desktop
Integrating your Oracle Cloud Database and Oracle E-Business Suite with Microsoft Power BI can be a daunting task, especially when dealing with complex data structures and security protocols. However, this connection is crucial for Database Administrators and IT Professionals looking to leverage the powerful analytics and visualization capabilities of Power BI.
In this comprehensive how-to guide, we will walk you through the steps to create a secure and reliable connection between Oracle databases and Power BI. With Apps Associates as your trusted partner, you’ll gain the expertise needed to successfully execute this integration and unlock valuable insights from your data.
Stay tuned as we simplify the complexities and empower you to enhance your data analytics capabilities with this step-by-step guide

The problem
As part of a recent technology implementation project, Apps Associates used an Oracle Database as a data source and Microsoft Power BI to create reports. This is a solution for our customers to be able to harness the power of their Oracle data into powerful visuals in Power BI. While initially complex, the Apps team created a solution that conquered the intricate integration and gave our customer the results they were hoping for.
Below, we will detail a comprehensive solution for establishing a connection between Oracle and Power BI.
Downloading Required Applications:
Before getting started, ensure you have all the necessary applications downloaded. As always, ensure you are operating within your company’s cyber security requirements.
Step 1:
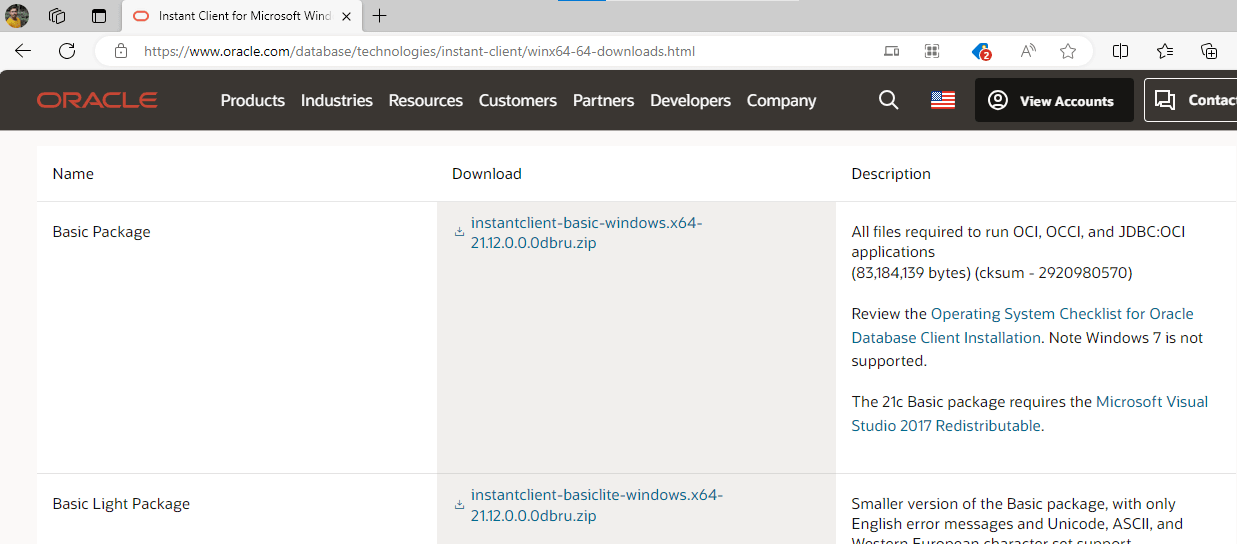
– Download Basic Package Instant Client.
– Save the downloaded Instant Client in C drive.
Step 2: Configure System Variables
This is the crucial step, where Environment Variables should be configured. To do this, click on the Windows icon in the taskbar and search for “Environment Variables.” Select “Edit environment variables for your account.” Please follow the steps outlined below:
- In the System Variables section, click on “New” to create a new system variable. Enter “ORACLE_HOME” as the Variable name and “C:\instantclient_21_12” as the Variable value, then click “OK” to save your changes.

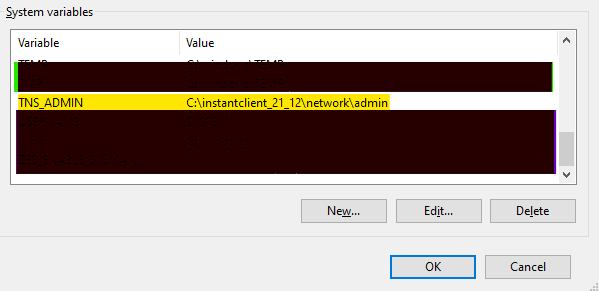
- Add the TNS_ADMIN variable to the environment variables.
- In the System Variables section, verify whether the TNS_ADMIN variable already exists.
- If it does exist, update the path as shown in the screenshot below.
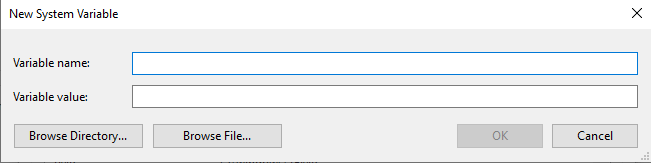
- If the TNS_ADMIN variable does not exist in the System Variables section, click “New” to create a new system variable.
- Enter “TNS_ADMIN” as the Variable name and “C:\instantclient_21_12\network\admin” as the Variable value, then click “OK” to save your changes.
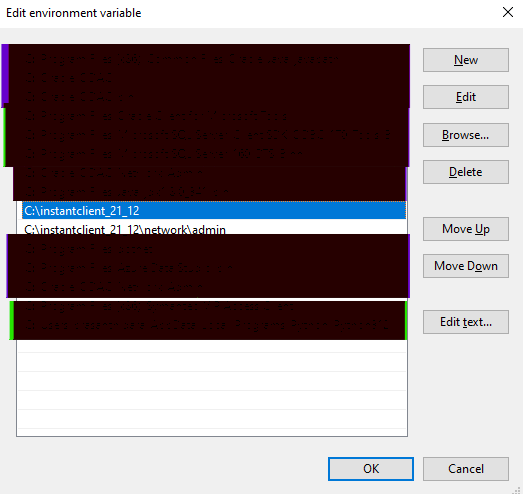
- Adding Variables to PATH
- Locate the PATH variable in the System Variables list, then select it and click on “Edit.”
- Proceed to add the necessary variables to the PATH variable as required.
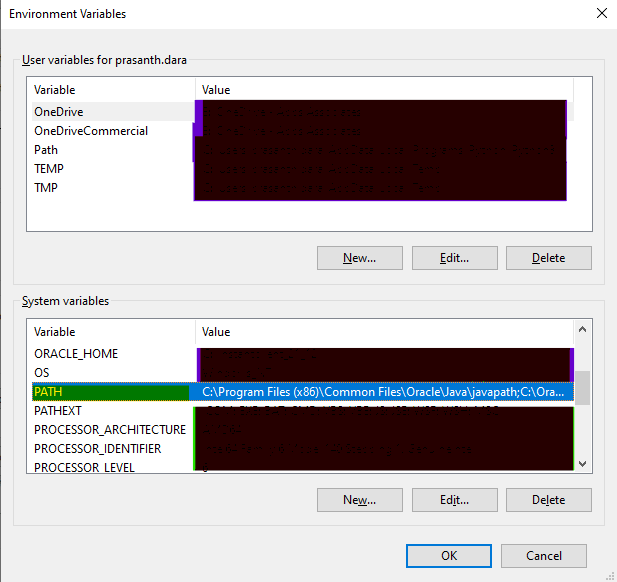
- Add both the ORACLE_HOME and TNS_ADMIN variables to the PATH variable.
- Click “New,” then paste the paths for ORACLE_HOME and TNS_ADMIN, and click “OK” to save your changes.
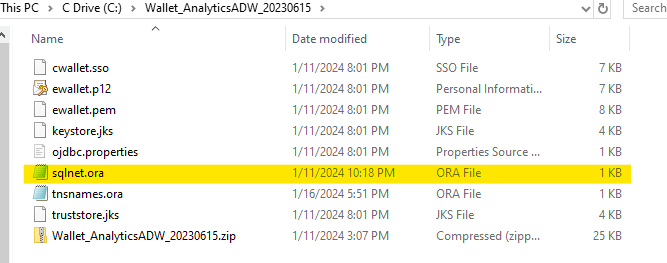
Step 3: Configure wallet folder
- Acquire the wallet folder, which includes the ora and tnsnames.ora files, as well as the database credentials.
- Extract the wallet file and save it in a designated location, preferably on the C or D drive.
- Copy the zipped wallet file and paste it into the extracted wallet directory.
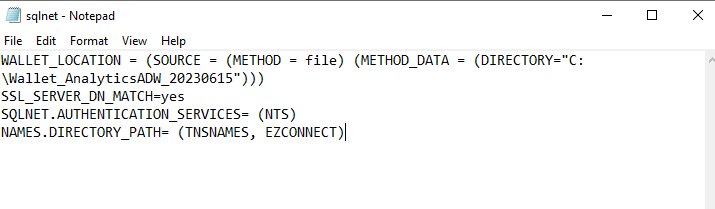
- Configure the sqlnet.ora file with the recommended settings as outlined.
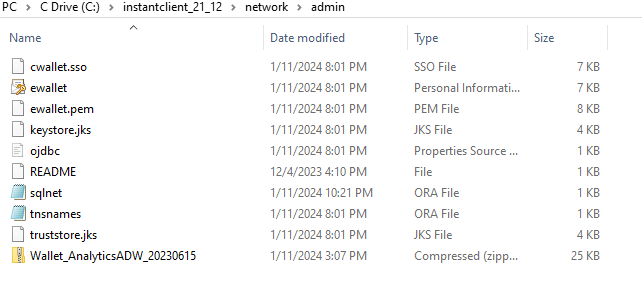
- Copy all files from the wallet folder and paste them into the Instant Client directory located at “C:\instantclient_21_12\network\admin”.
Step 4: Connection in Power BI Desktop
- Open Power BI Desktop
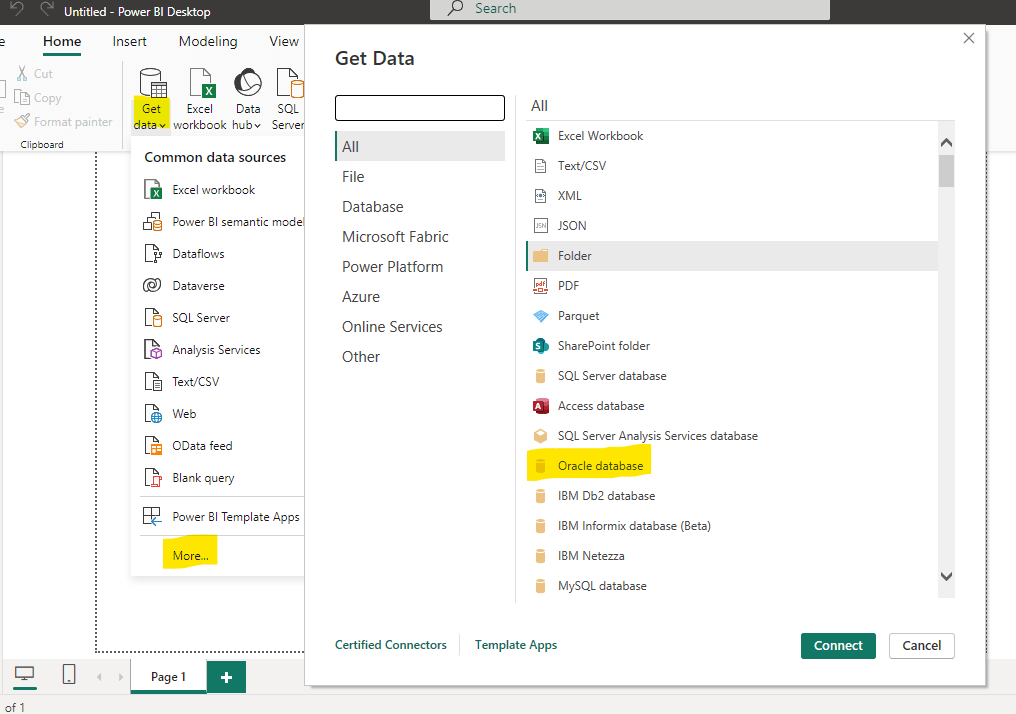
- Select “Get Data,” then click on “More,” and choose “Oracle Database” as highlighted in the screenshot below.
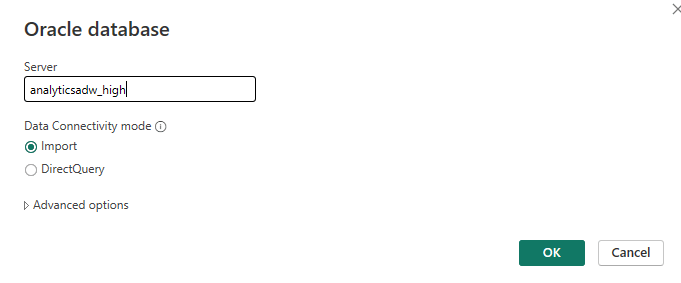
- Enter the server name found in the ora file within the wallet folder, and then click “OK.”
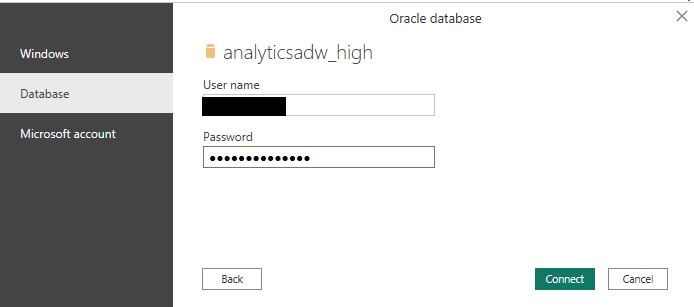
- Select the database option and enter the username and password.
- Click “Connect” to establish the connection.
- Select the required tables, then click on “Transform” or “Load” to proceed.
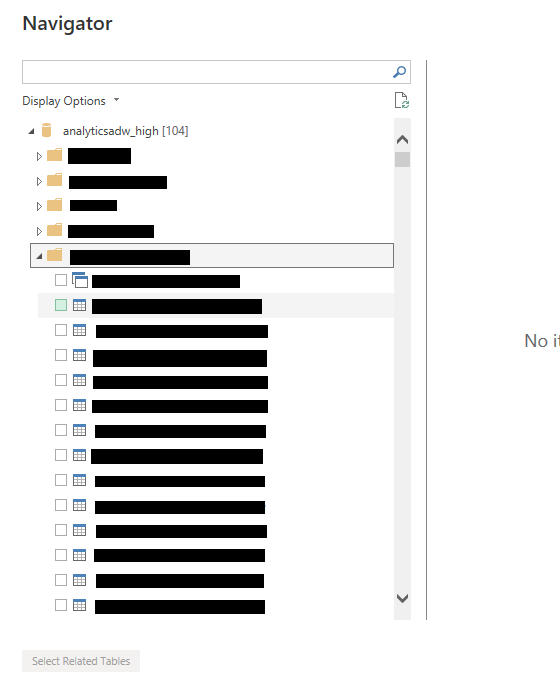
- Once the tables have been imported, rename the Facts and Dimensions with appropriate names as per business requirements.
- Create the necessary joins and proceed to develop the reports.
Summary:
- Challenge: Connecting Oracle (Cloud) and Oracle EBS to Power BI was complex, affecting productivity.
- Solution Overview: A detailed approach was developed to facilitate a seamless connection.
- Required Applications: Download the Basic Package Instant Client and save it in the C drive.
- Environment Variables Configuration:
- Set ORACLE_HOME to C:\instantclient_21_12.
- Configure TNS_ADMIN for network configurations.
- Update the PATH variable to include both ORACLE_HOME and TNS_ADMIN.
- Wallet Folder Setup: Obtain and extract the wallet folder containing ora and tnsnames.ora, along with database credentials.
- Power BI Connection:
- Use “Get Data” in Power BI to select “Oracle Database.”
- Enter the server name from the ora file and input credentials.
- Data Preparation: Import necessary tables, rename them, and create joins to develop reports.
- Outcome: Successfully integrated Oracle database with Power BI, enabling effective reporting.
In conclusion, successfully connecting Oracle Cloud Database and Oracle E-Business Suite with Microsoft Power BI can significantly elevate your organization’s data analytics capabilities. By following the steps outlined in this guide, you can establish a secure and efficient data pipeline, enabling powerful data visualization and real-time business insights. Leveraging the expertise of Apps Associates, you can overcome integration challenges with ease and maximize the value of your data assets. Empowered with these insights, your organization can make data-driven decisions to drive growth and innovation.